Synology NAS Data Recovery Tool
How to Get Back Deleted Files on a Synology NAS
You can get back lost files from your Synology NAS drive in three different ways.
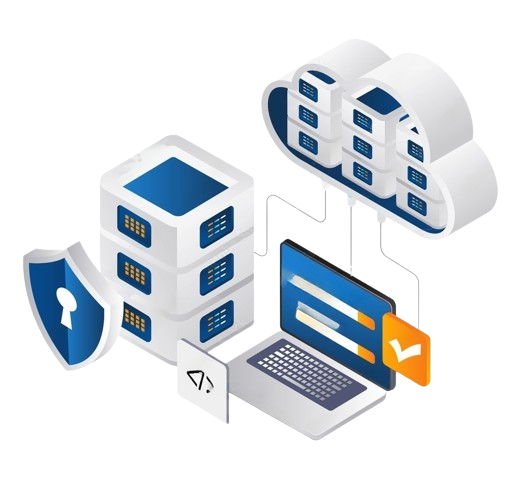
You can make a private cloud with the Synology NAS where you can store, back up, view, and share your files safely and freely. It lets you delete files from the NAS hard drive, which most of the time is done by accident. So, this post will teach you how to do Synology NAS data recovery, which will help you get back deleted files from your Synology NAS.
Part 1: Why You Lose Data on Your Synology NAS
Synology NAS devices can lose data in the same ways that other data storage media can, like when you delete a file by mistake, the operating system fails logically, or viruses and other bad software damage the device.
NAS storages can also lose data in certain situations, such as when an operator makes a mistake while re-configuring RAID or adding extra disks to the NAS box wrongly, when NAS software fails or updates are not installed correctly, and so on.
Let’s look at the possible reasons why a Synology NAS drive might fail and the Synology NAS data recovery tools that can fix them.
Reasons behind Synology data recovery requirements
- Deleted by accident
- Recycle Bin turned off or empty
- Setting up or formatting the disk
- Damage to the NAS file system that makes data unavailable
- Failure of RAID rebuilding
- Unexpected power outages or changes in energy that damage NAS servers
When a virus or malware attacks, data is lost.
Part 2: How to Get Back Lost or Deleted Files on a Synology NAS Server
Synology has a feature called “Recycle Bin” that can be turned on or off for each shared folder and is used to store removed files. In this section, you will learn how to turn on the Synology Recycle Bin and get back files that you have removed from it.
You can get back removed or lost files from Synology NAS with third-party NAS recovery tool if the Recycle Bin is empty or the files were lost for some other reason.
When you make a shared folder, the “Enable Recycle Bin” button is already checked. When this option is turned on, a section is made where deleted files are kept. You can remove files for good or get them back from the recycle bin. To use the Recycle Bin to get back deleted files from the Synology NAS drive, do the following:
First, make sure that the Recycle Bin is turned on for the shared folder you want to use.
To get the Recycle Bin feature to work:
1st Step: Go to DSM’s Control Panel and click on Shared Folder.
2nd Step: Pick a common folder and then go to Edit. Check or tick mark the box next to Enable Recycle Bin. If you only want administrators to be able to see the Recycle Bin, check the box that says “Restrict access to administrators only.” To save your changes, press OK.
To get back a file or folder that you removed from the Synology Recycle Bin:
3rd Step: Find the shared folder with the Recycle Bin function turned on in File Station.
4th Step: Look for the #recycle folder. Then, right-click on the folder or file you want to get back. To get back the deleted files from the Synology NAS system, click Copy to/Move to… and then click Move to…
Besides accidentally deleting files, there are other ways you could lose them on your Synology NAS, such as a sudden power loss, disk damage, a virus attack, and so on. The good news is that BLR NAS Recovery can help you get back things that you deleted or lost from your Synology NAS drive, no matter what happened.
BLR Synology Recovery Tool features:
- It can get back data from all major NAS brands, like Synology, QNAP, ASUSTOR, Maxtor, Western Digital, Buffalo, LaCie, and more.
- Help with all NAS data loss situations, like removing, formatting, OS crash, RAID failure, bad controller, power outage, and virus attack
- All RAID types should be supported, such as RAID 0, 1, 5, 6, and 10.
- Get back NAS files through a remote connection without having to take out the disk.
To get back the info on your Synology drives with BLR NAS Recovery, just do these 4 easy steps:
1st step: After installation, click on NAS Recovery.
Get BLR and put it on your Windows or Mac machine. First, open the Synology recovery tool. Then, go to the NAS and Linux menu and select NAS Recovery.
2nd step: Make a connection to your Synology NAS.
After pressing the NAS Recovery button, BLR will look for the Synology NAS device on its own. On the screen, you’ll see a list of NAS systems. You can get back lost or removed files from a Synology NAS device by choosing it.
To create a connection between BLR NAS Recovery and your Synology NAS, enter the IP address, port, user account, and password. This will allow the Synology recovery program to scan the drive for missing files.
3rd step: Scan Synology NAS for Deleted Files.
The scanning process will begin automatically following a successful connection. While BLR scans your Synology NAS hard disk, you can use filters to find the files you want more quickly.
4th step: Preview and recover Synology NAS data
After the scanning procedure is completed, you can preview the files before recovery to ensure that you are retrieving the correct data. Then, select Recover to restore the files from your preferred Synology NAS drive. The files will now be stored to your internal or external storage devices.
The Synology NAS data recovery method of BLR File Recovery tool is more involved than ToolsForge since the hard disks must first be removed from the Synology Server. But it does its job.
BLR File Recovery can successfully restore the disk order, block size, start offset, and other RAID configuration settings from an unplugged Synology NAS device.
Follow the steps below to recover deleted files from your Synology NAS using BLR:
After dismantling the NAS server
1st Step: Remove the hard disks from the Synology NAS and attach them to your Windows PC. Remember to turn off the power when detaching and reconnecting hard drives. Before removing any disks from the Synology NAS, label them with the appropriate section. These markings will allow you to reassemble everything if necessary. Refuse any requests from Windows on the machine to which you have connected the disks to “initialize disks” or “format” them.
2nd Step: Launch BLR File Recovery. Most NASes employ MD-Raid or LVM drivers to handle arrays. BLR has the ability to break the MD-Raid and LVM control structures.
3rd step: Press Start after picking the NAS disk you want to recover. For btrfs-based NASes like NETGEAR, the volume will be in the BTRFS part; for other NASes, look in the Linux MD-Raid or Linux LVM sections.
4th step: Wait until ToolsForge File Recovery retrieves files, then click Preview to assess the recovery’s quality. After purchasing the license key, transfer the retrieved data to the designated storage media.
Comparing BLR and ToolsForge How Do I Choose the Best Synology NAS Recovery Tool?
People who use Windows and need to get back lost files from different storage devices are often told to use BLR and ToolsForge.
The interfaces for both of these data recovery programs are easy to use, and the data recovery process is simple and step-by-step. There are, however, some important differences between them that you should know about ahead of time in order to pick the one that best meets your needs. Take a look at this table.
Each of these programs, BLR and ToolsForge NAS Recovery, has many useful features. There is, however, only one perfect choice for you. Some people may like that BLR works with a lot of Linux file systems, but BLR actually recovers data better and has more features. It’s also much cheaper to buy BLR than any other NAS Synology restore tool.
BLR Tools: Why should you pick them?
ToolsForge only works on Windows, but BLR works on both Windows and Mac PC. BLR also doesn’t have to take out the NAS drives to get the data back; doing so could damage the drives and cause more data loss. Other recovering tools with the same features cost a lot more than BLR.
Exactly why should you pick BLR?
For advanced data recovery from Linux, you should buy BLR. It works with EXT4 and BTRFS file systems, but not with XFS or ToolsForge.
In Conclusion
A Synology NAS drive can fail for a number of reasons. If you delete files from a Synology NAS drive by mistake, don’t worry—the data can be easily recovered using the three methods above: the Recycle Bin, the BLR NAS Recovery program, and the ToolsForge NAS recovery tool.
There is also a comparison between BLR and ToolsForge. We strongly suggest BLR because it is safe to use and easy to set up. For a low price, you can get back things that you deleted or lost from your Synology NAS.
Recommended: Get Your Synology NAS Data Back with the Help of Professionals
If you lose a lot of data, like when you erase your Synology drive, have a RAW disk, lose a partition, get a system boot error, or your virtual disk gets corrupted, you may need more help. Talk to BLR NAS Data Recovery Services about getting one-on-one hand recovery service at a low cost. After a FREE analysis, they might be able to provide the following services:
Talk to the pros at BLR NAS data recovery about getting one-on-one manual recovery service. After a FREE evaluation, we could do the things below. Our engineers have worked in the field for decades and know how to fix a broken RAID system and get data back from all RAID levels.
- Get back data from corporate RAIDs like QNAP, Synology, WD, Buffalo, and more.
- Easily get back any RAID data that was lost because of a problem
- Take care of disks that turn into GPT-protected partitions
- Get back files from RAID from afar. Not necessary to ship
- It only takes a few clicks to get back your Synology data.
We hope that you now know the two ways to get back data from a Synology NAS drive after reading this guide. The BLR NAS data recovery wizard gives you a unique and easy way to get back lost or destroyed files from a NAS device set up as a single drive, RAID 0, RAID 1, or RAID. You don’t have to take out the disks or restart the RAID; all it takes is a few clicks to get back the data from your NAS.
Frequently Asked Questions
Yes. A recycle bin can be used for shared files on Synology network-attached storage (NAS). This function is on by default, but it’s easy to turn it off and empty the Recycle Bin folder by folder.
Anything in the Recycle Bin for more than 30 days will be deleted for good and cannot be retrieved. Recycling items count toward the space you have for records and storage.
Yes. But resets don’t change the info on the Synology NAS. You must back up your files and system settings before you reset, though.
Synology NAS data recovery is the process of getting back data from a Synology Network Attached Storage (NAS) device that you have lost, deleted, or can’t get to.
In order to get back lost or removed files from a Synology NAS, the storage drives are usually scanned, the file system is analyzed, and data structures are rebuilt.
When data is lost on a Synology NAS, it’s usually because someone deleted a file by accident, the power went out, the disk became corrupt, or the user formatted the drive by mistake.
Yes, a Synology NAS data recovery tool can often get back lost files by scanning the hard drives for data that can be recovered.
To get the data back from a broken Synology NAS, you may need to fix or replace the broken hardware parts and then use data recovery tools or services to get the data off of the storage files.
Data recovery tools made just for Synology NAS devices, like Synology Data Recovery, can help you get back the data you lost on your Synology NAS system.
Yes, a Synology NAS data recovery tool can often get back data from a drive that has been formatted by looking at the file system and putting the data structures back together.
Yes, it is possible to get back data from a Synology NAS that is set up in RAID. To rebuild the RAID stack and get the data back from multiple drives, you can use special tools and methods for data recovery.
To get your data back as quickly as possible, you should stop using the Synology NAS right away, don’t make any more changes to the drives, and get professional help or use trusted data recovery tool.
Yes, some Synology NAS data recovery tools can get back data from files that have been encrypted. But the process of recovery might need the right security keys or passwords.
Yes, there are free tools like TestDisk and PhotoRec that can get back lost files from a Synology NAS. On the other hand, free tools might not have as many features or functions as paid ones.
How often data can be recovered from a Synology NAS depends on a number of things, such as what caused the data loss, how bad the damage is, and the exact data recovery methods used. Success rates can be different for each case.
Yes, it is possible to get back data from a Synology NAS device that has been physically broken. You can get help from professional data recovery services to fix broken tools and get back the data on the storage drives.
Yes, it is possible to get back files from a Synology NAS that had a power surge. The recovery method includes figuring out what’s broken, fixing or replacing the parts that are broken, and then getting the data back from the storage drives.
To keep from losing more data, you should turn off the Synology NAS right away, not try to recover data again without the right information or tools, and get professional help to lower the risk of doing damage that can’t be fixed.
Please keep in mind that the success of data recovery depends on the details of the case and how badly the data was lost. When you lose important or complicated data, you should always talk to a professional data recovery service.

Need Any Kind Of IT Solution?